


I had some difficulties when I migrated my blog to Hashnode. The instructions provided were clear, but due to some limitations with my provider, Amazon Route 53, the process became complicated for me.
My provider doesn't support CNAME flattening, which allows us to create a CNAME record at the root domain without violating the DNS specifications.

That's why I decided to document my migration and explain how I migrated my blog using Amazon Route 53 and Cloudflare.
Let's start!
Prerequisites
If you want to follow along, be sure to:
- Have a domain name
- Have a Cloudflare account
Requirements
Because I already had an existing blog to my root domain, I wanted to have the same configurations to preserve my SEO and keep my analytics.
My requirements were the following:
- Use my root domain as my blog URL
- Redirect www to the root domain
- Use my existing SEO metadata
- Have the same look and feel that my previous blog

How did I migrate my blog?
Two steps were necessary for migrating my blog to Hashnode:
- Configure Cloudflare to map Hashnode domain name
- Edit the DNS configuration - Amazon Route 53 in my case
Let's explain each step in detail.
Configure Cloudflare to map Hashnode domain name
You're probably wondering why Cloudflare and that's a good question!
As mentioned previously, I wanted Hashnode to use my root domain. Because Amazon Route 53 doesn't support CNAME flattening, I needed to use another DNS provider, Cloudflare, to bypass this limitation.
The advantage of using Cloudflare? Nothing to pay! You use your actual provider, and with some configurations, it directly works!
Add a Site
- In Cloudflare Home page, click + Add Site:

- Enter your domain, and click Add site:
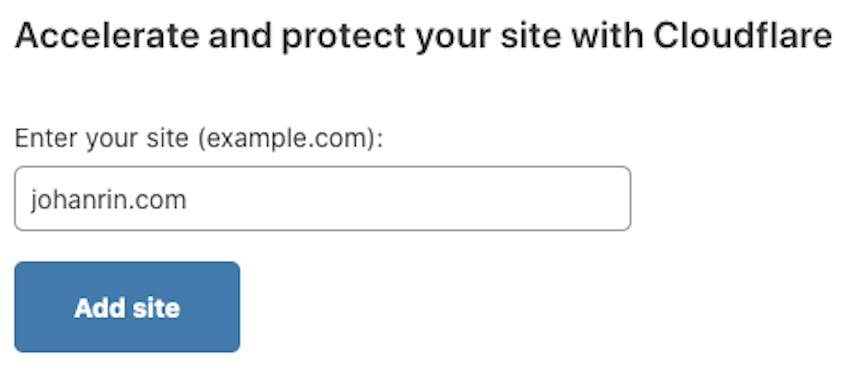
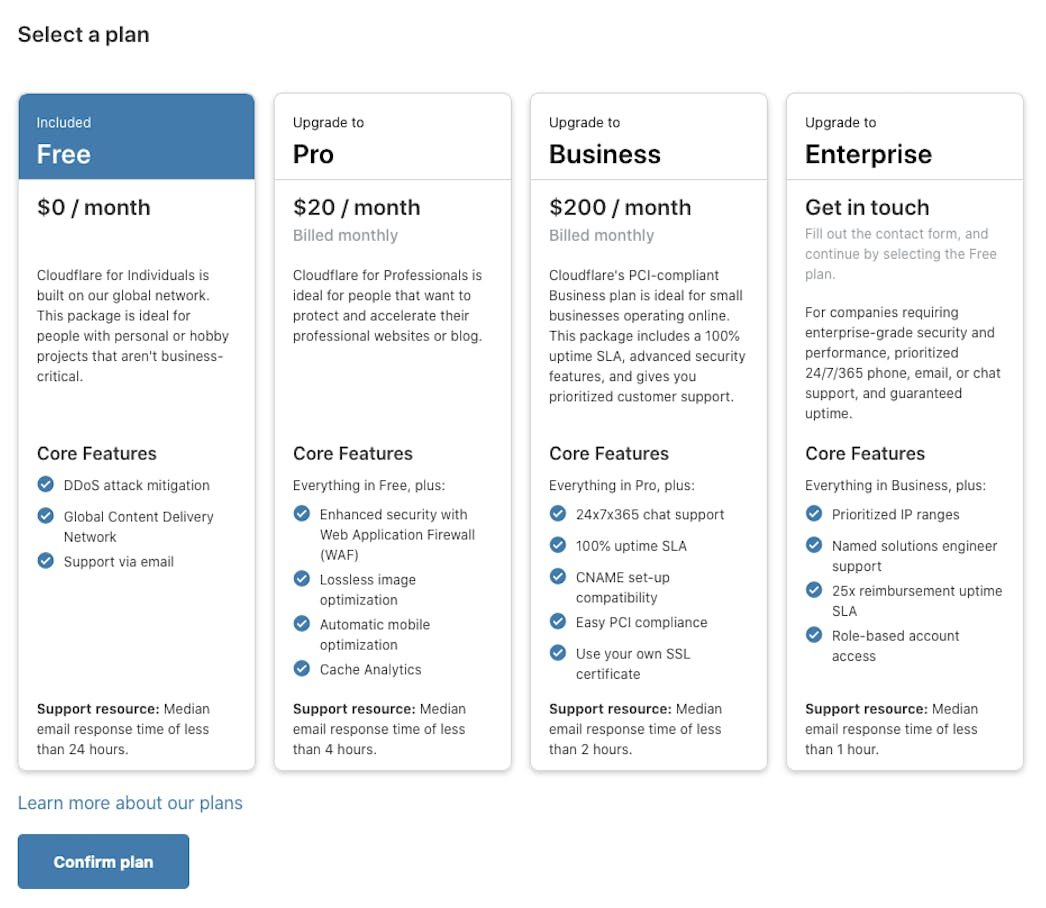
- Select the Free plan, and click Confirm plan:
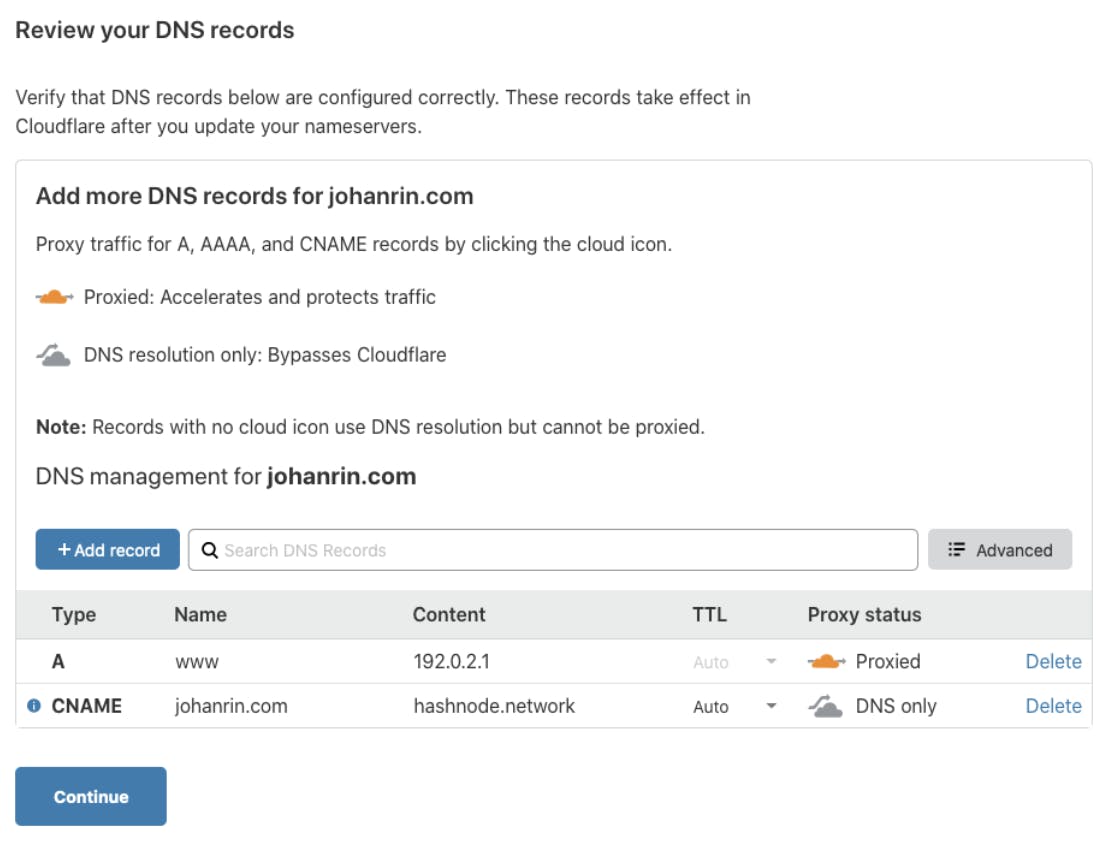
- Click +Add record, enter the CNAME and A entries with the following settings, and click Continue:
| Types | Name | Content | TTL | Proxy status |
| CNAME | yourdomain.com | hashnode.network | Auto | DNS only |
| A | www | 192.0.2.1 | Auto | Proxied |
Be sure to add your domain instead of yourdomain.com for the CNAME entry! Also, 192.0.2.1 is a dummy IP to help us redirect www to the root domain.
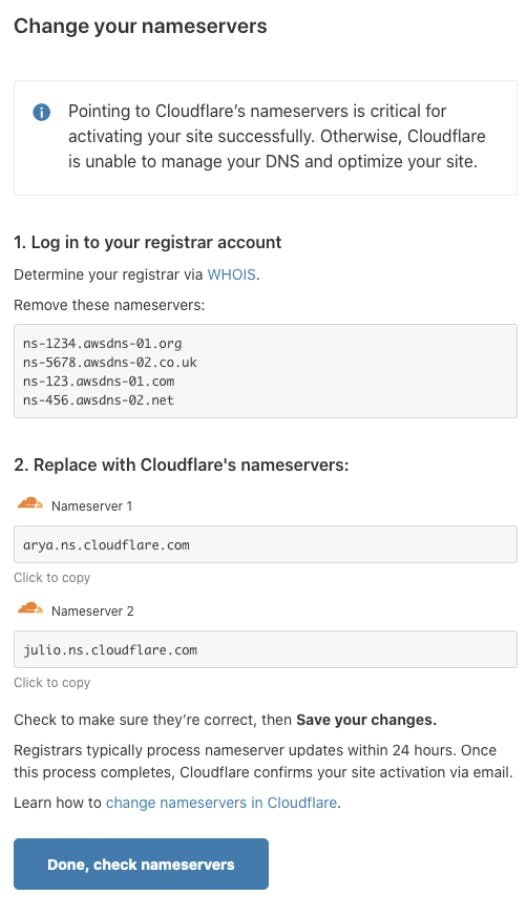
- Copy Cloudflare's nameservers to a text file, and click Done, check nameservers:
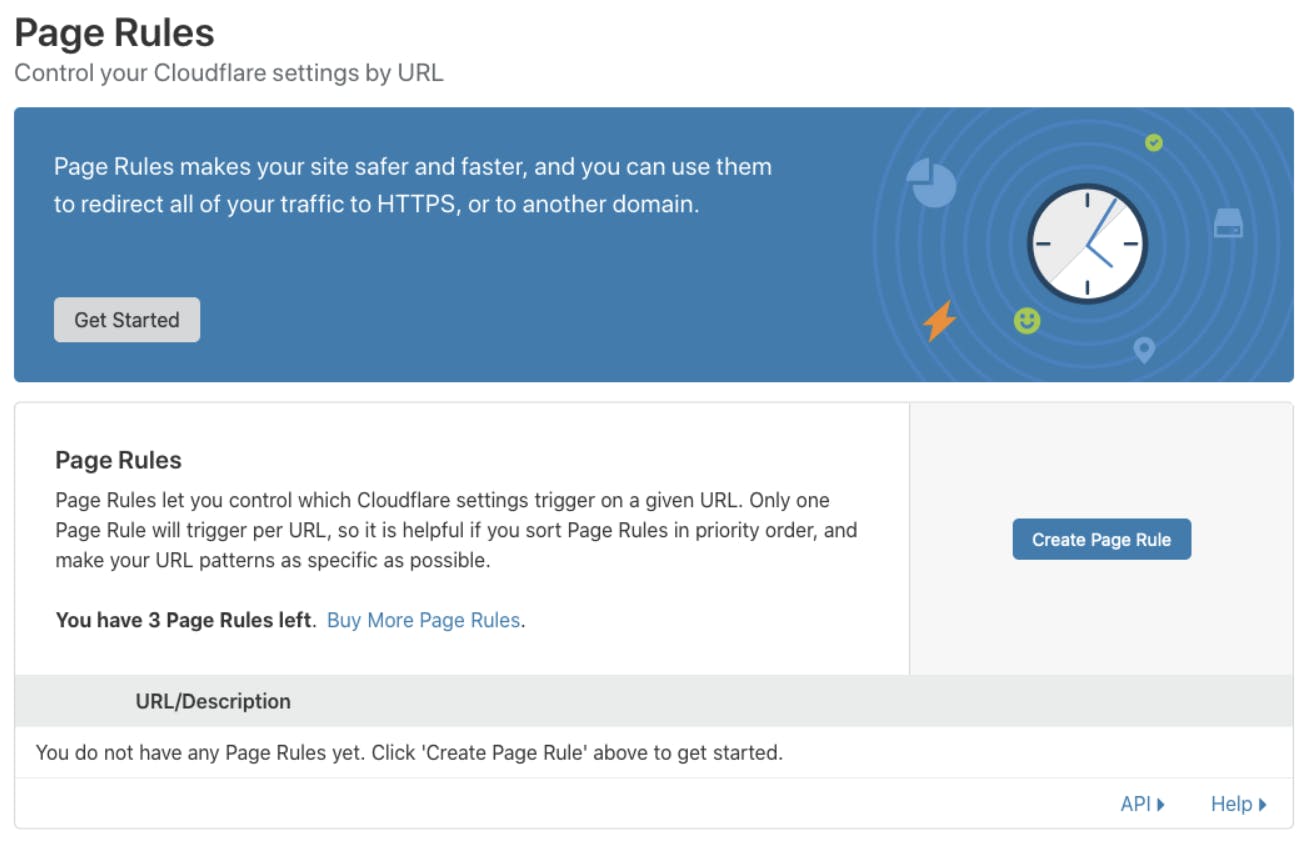
Page Rules
- In Cloudflare Page Rules page, click Create Page Rule:
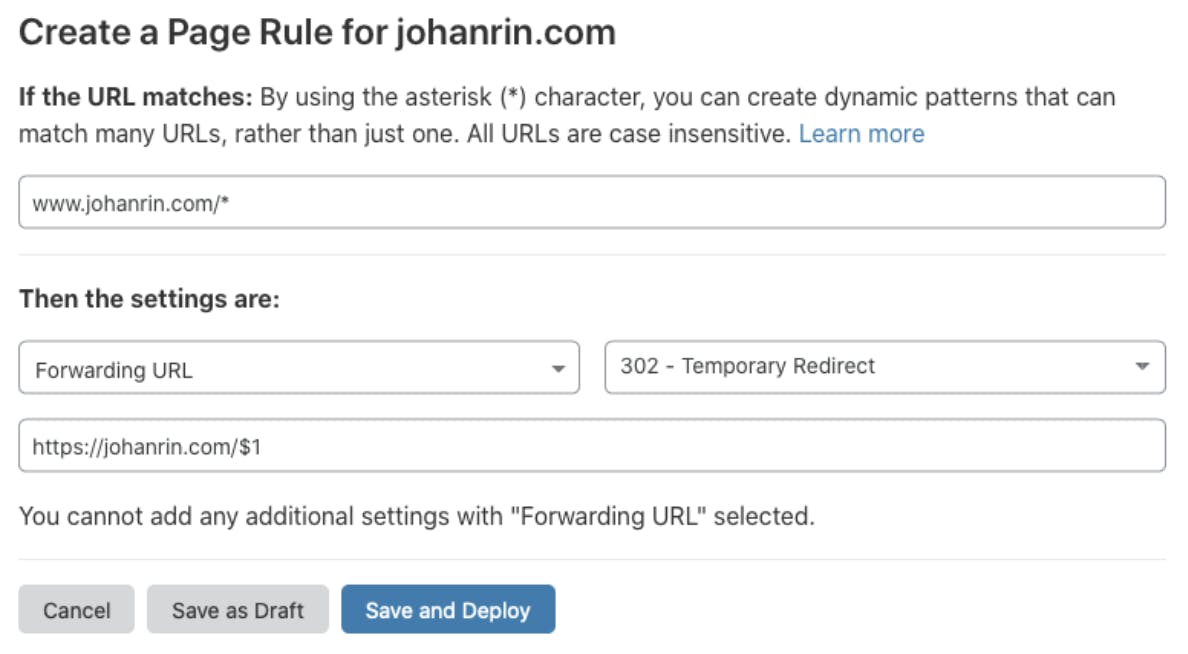
- Create a rule to redirect www to the root domain with the following settings, and click Save and Deploy:
| Setting | Value |
| Source URL | www.yourdomain.com/* |
| Type | Forwarding URL |
| Status code | 302 - Temporary Redirect |
| Destination URL | https://yourdomain.com/$1 |
Be sure to add your domain instead of yourdomain.com. Also, keep the special characters * in the source URL and $1 in the destination URL. The * means it will forward all pages, and the $1, it will keep the path.
For example, if the user types www.yourdomain.com/about in his browser, it would be redirected to https://yourdomain.com/about.
Domain settings
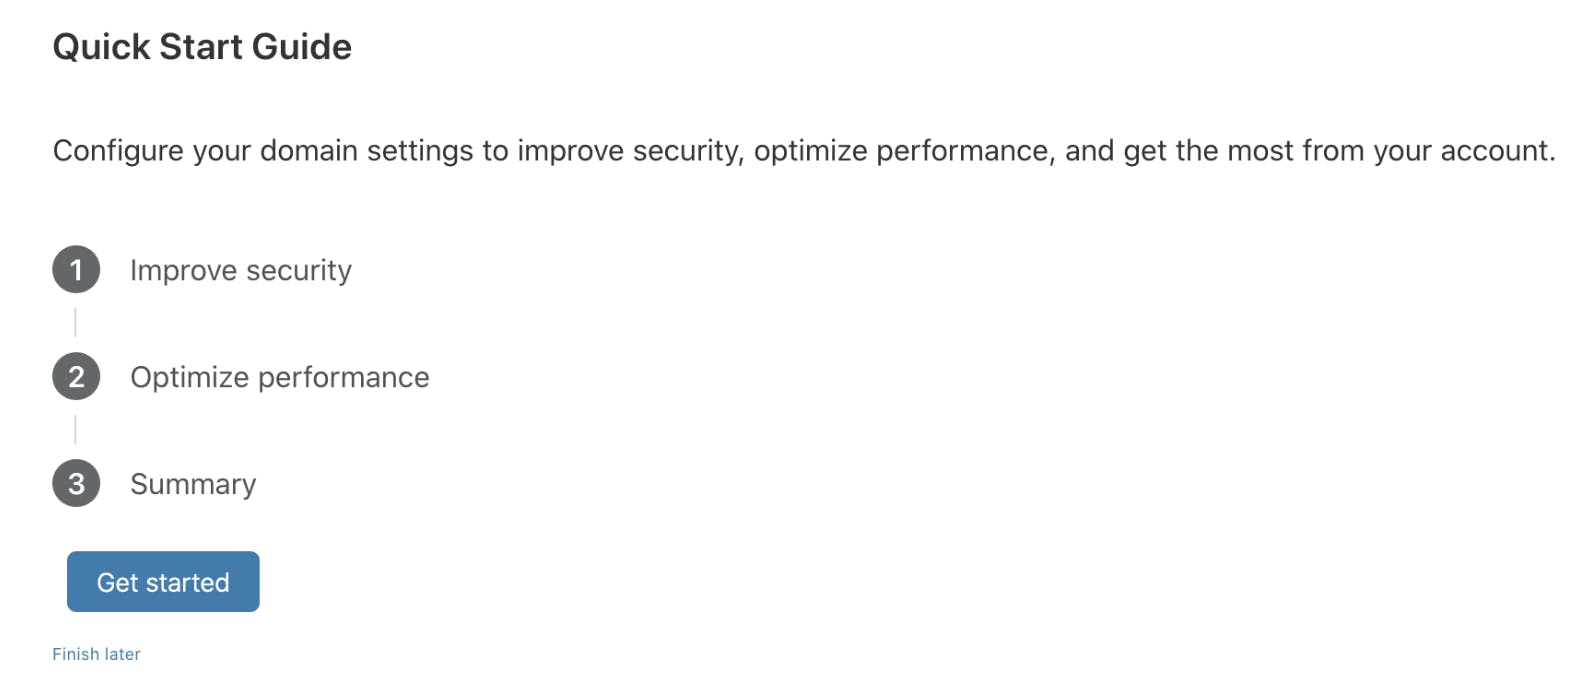
- In Cloudflare Overview page, click Review Settings:

- When the Quick Start Guide is displayed, click Get started:
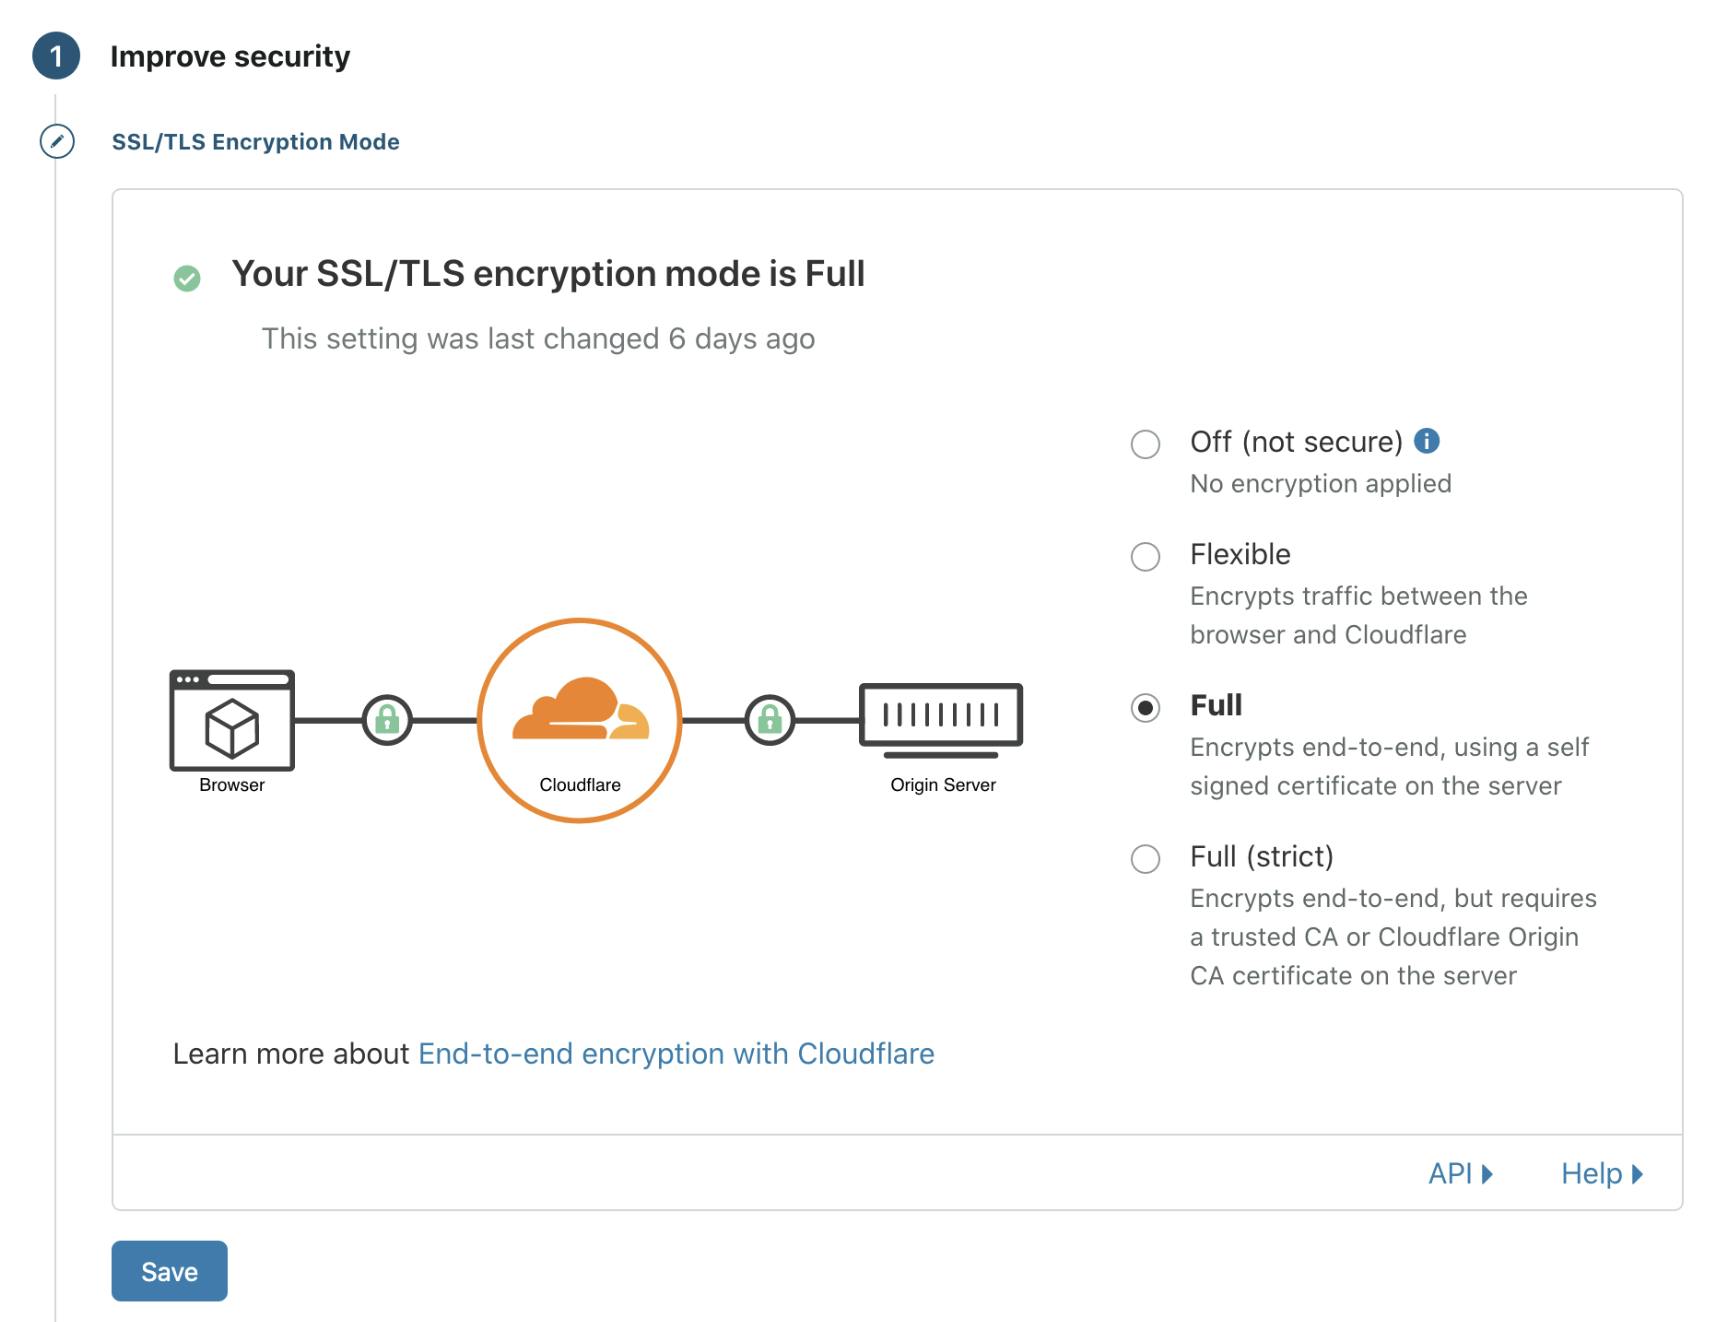
- Select Full, and click Save:
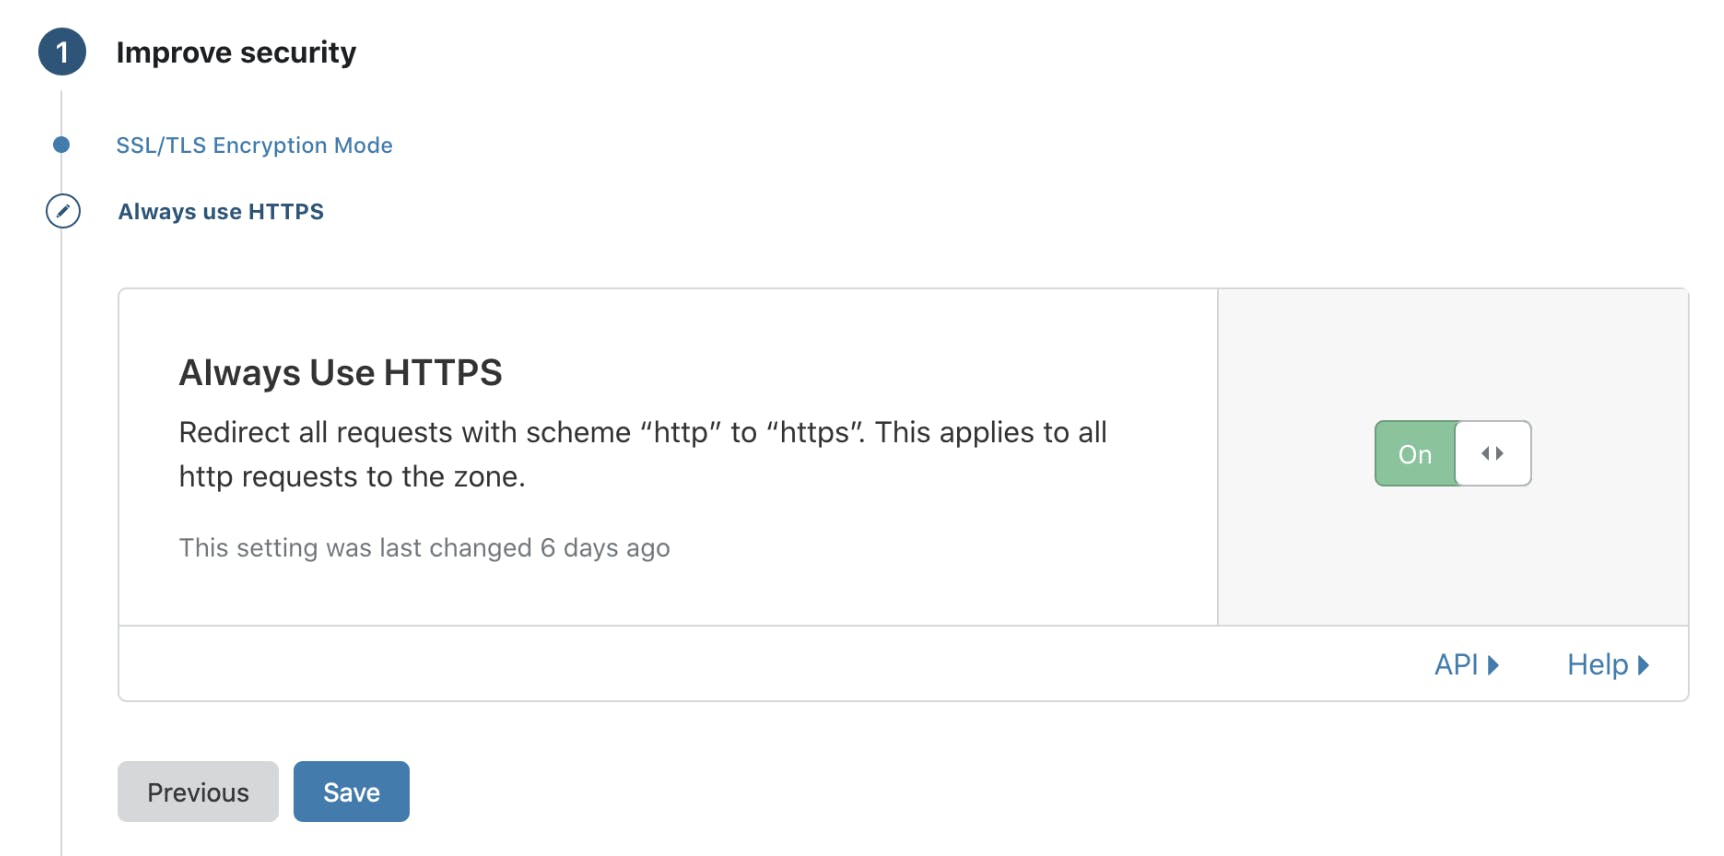
- Check Always Use HTTPS is activated, and click Save:
- Check JavaScript, CSS, and HTML are selected, and click Save:

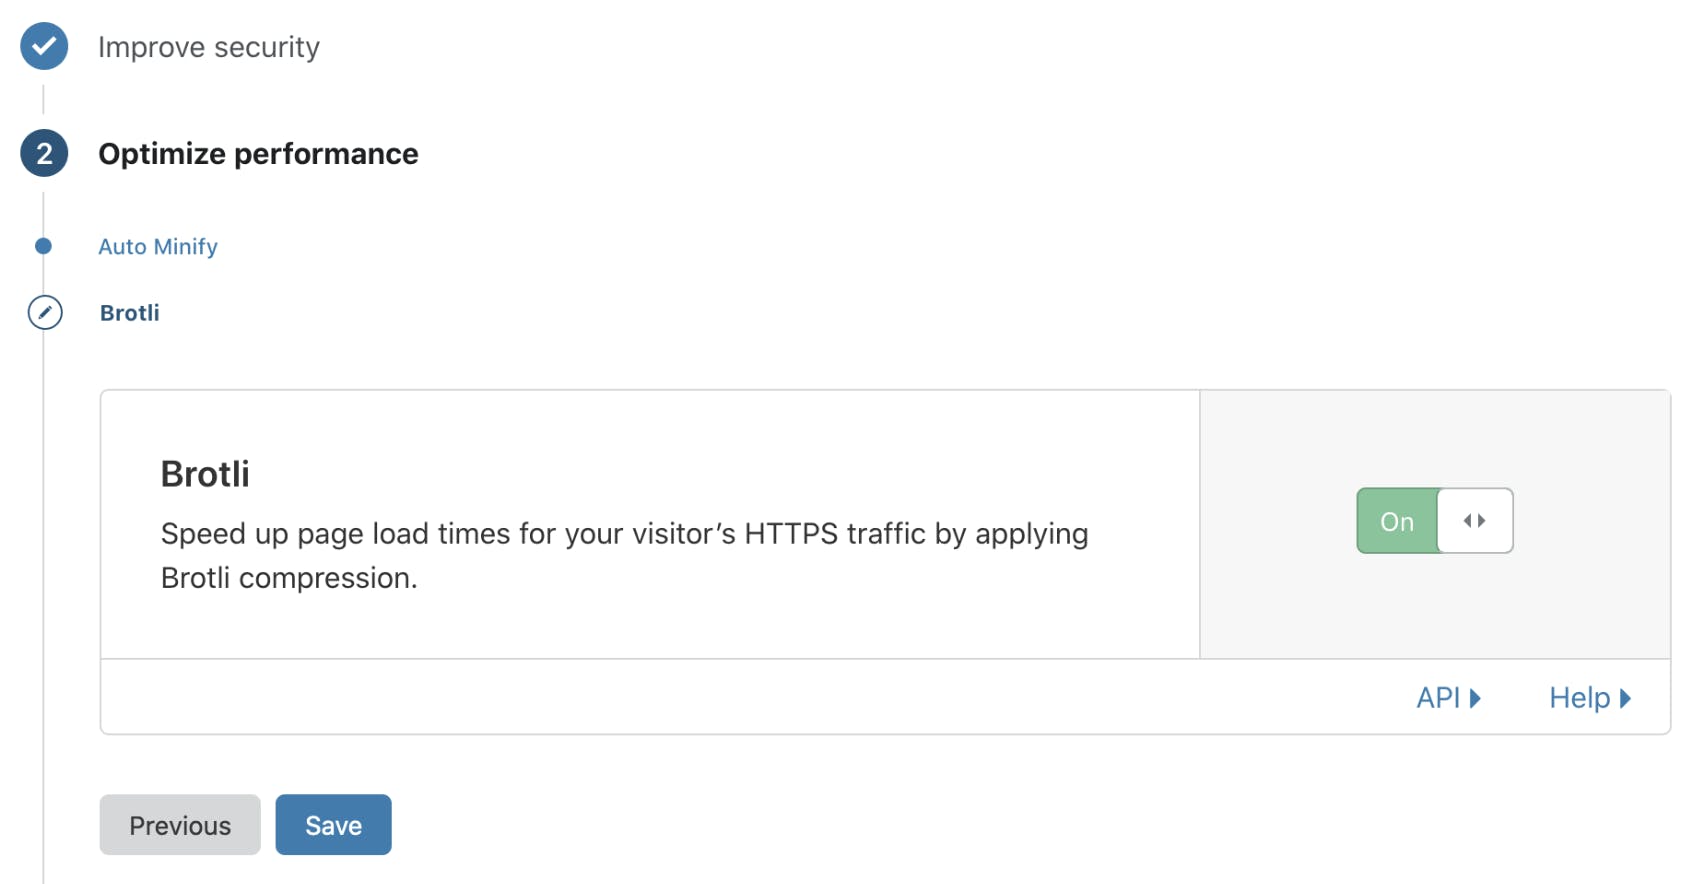
- Check Brotli is enabled, and click Save:
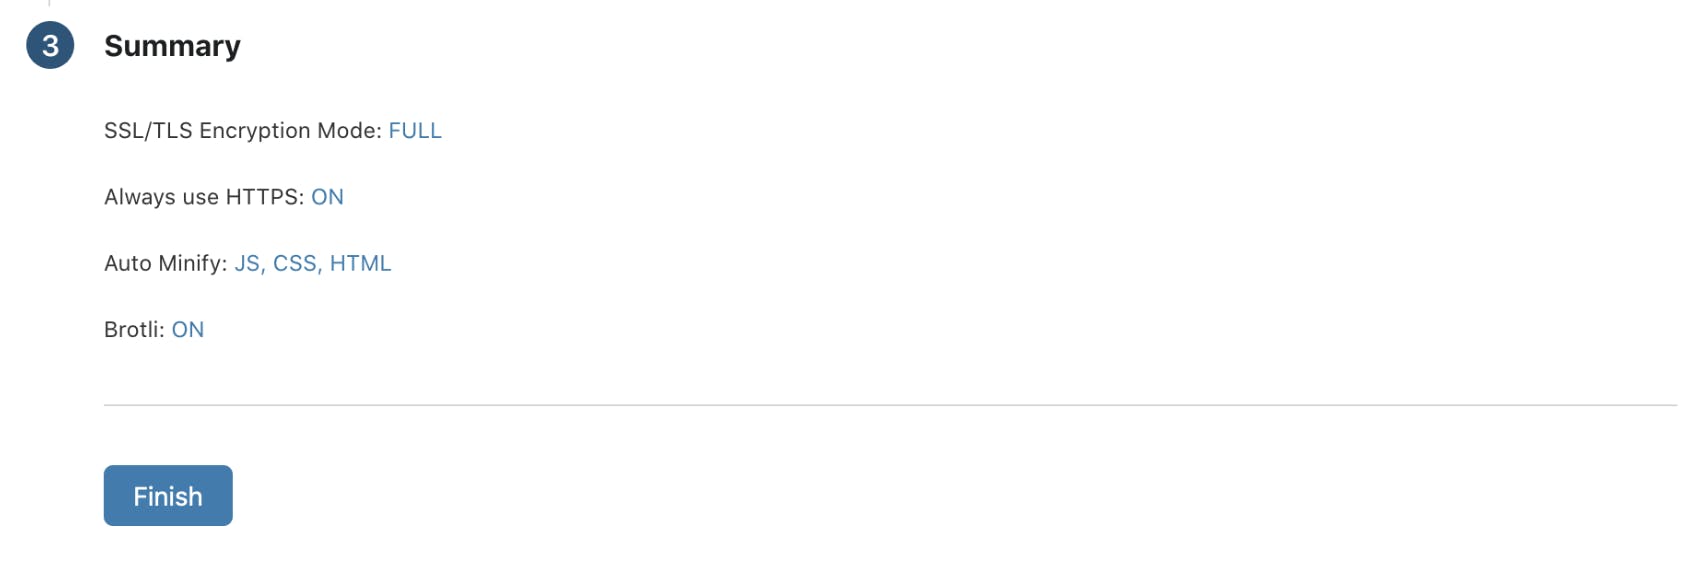
- When the Summary is displayed, click Finish:
Edit the DNS configuration
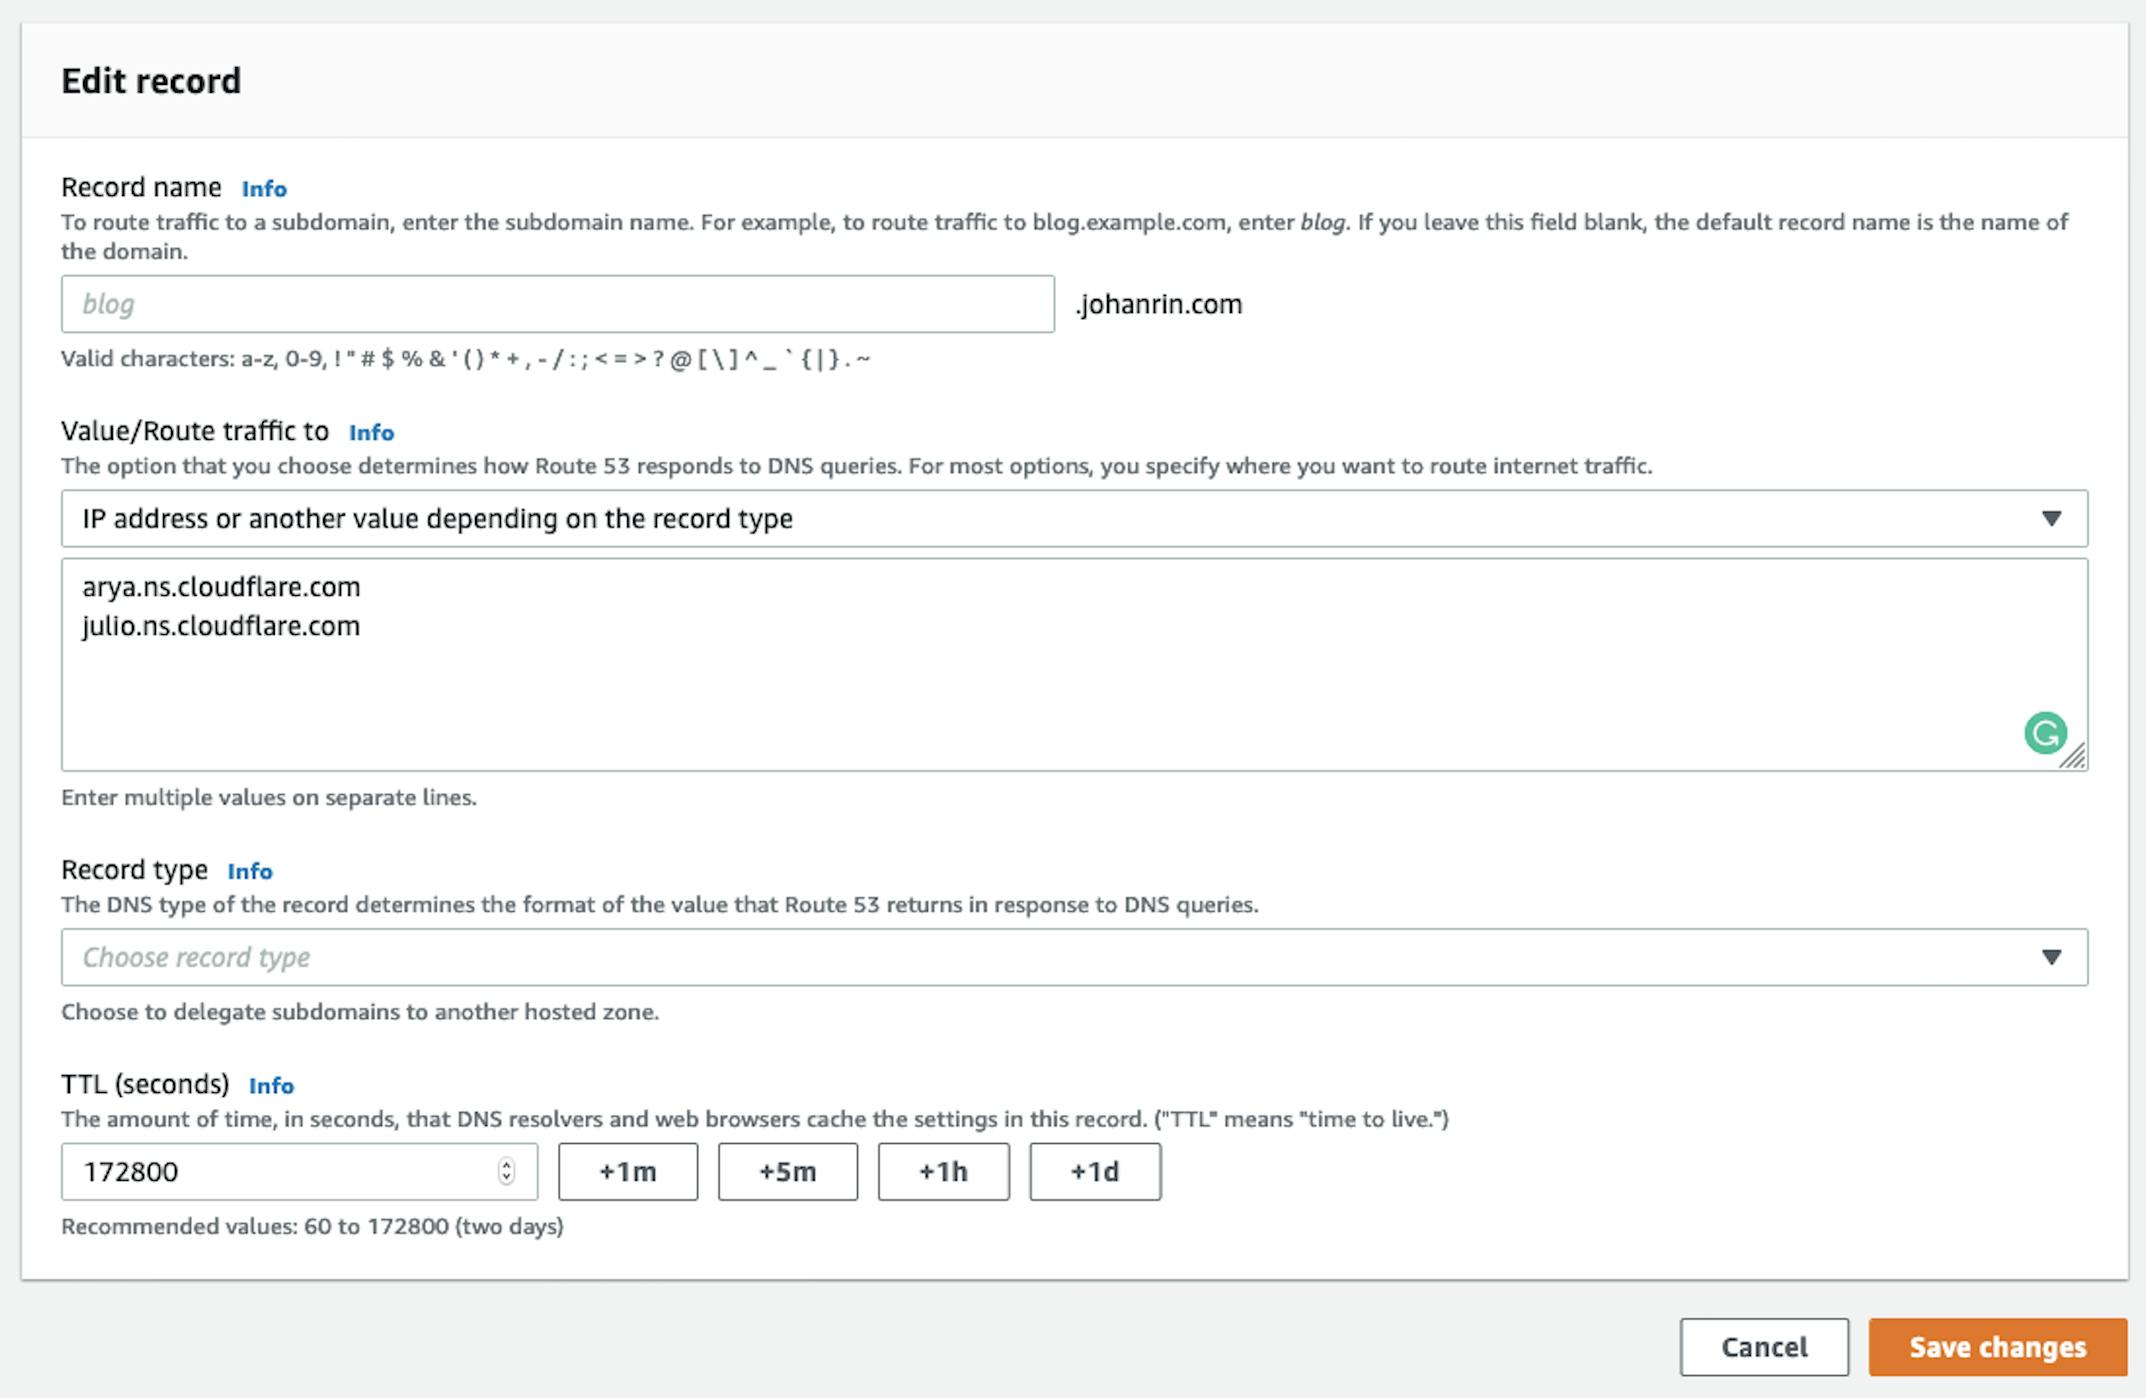
- In Amazon Route 53, select your NS record, and click Edit:
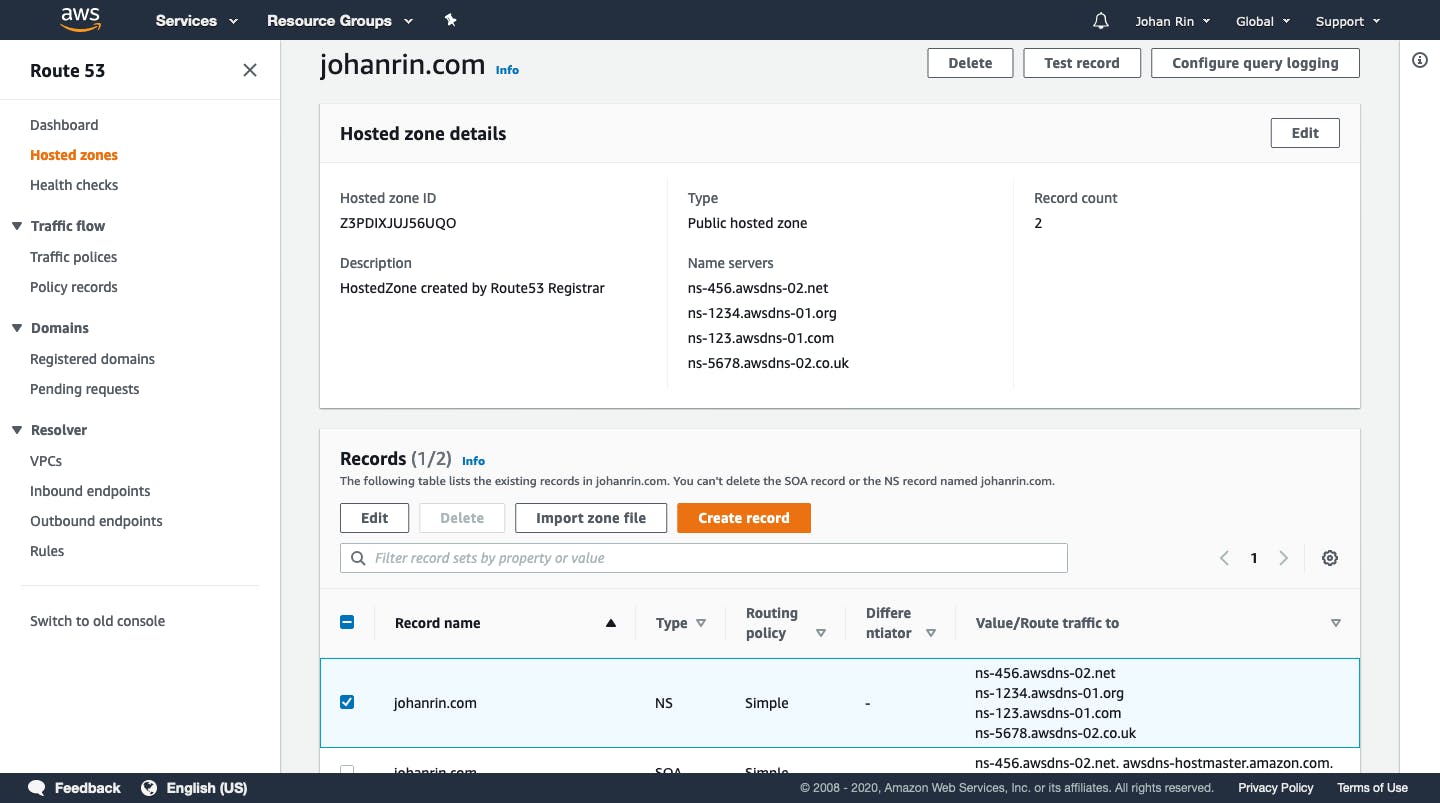
- Replace the values by Cloudflare's nameservers, and click Save changes:
- In the Registered domains section, click your domain name:
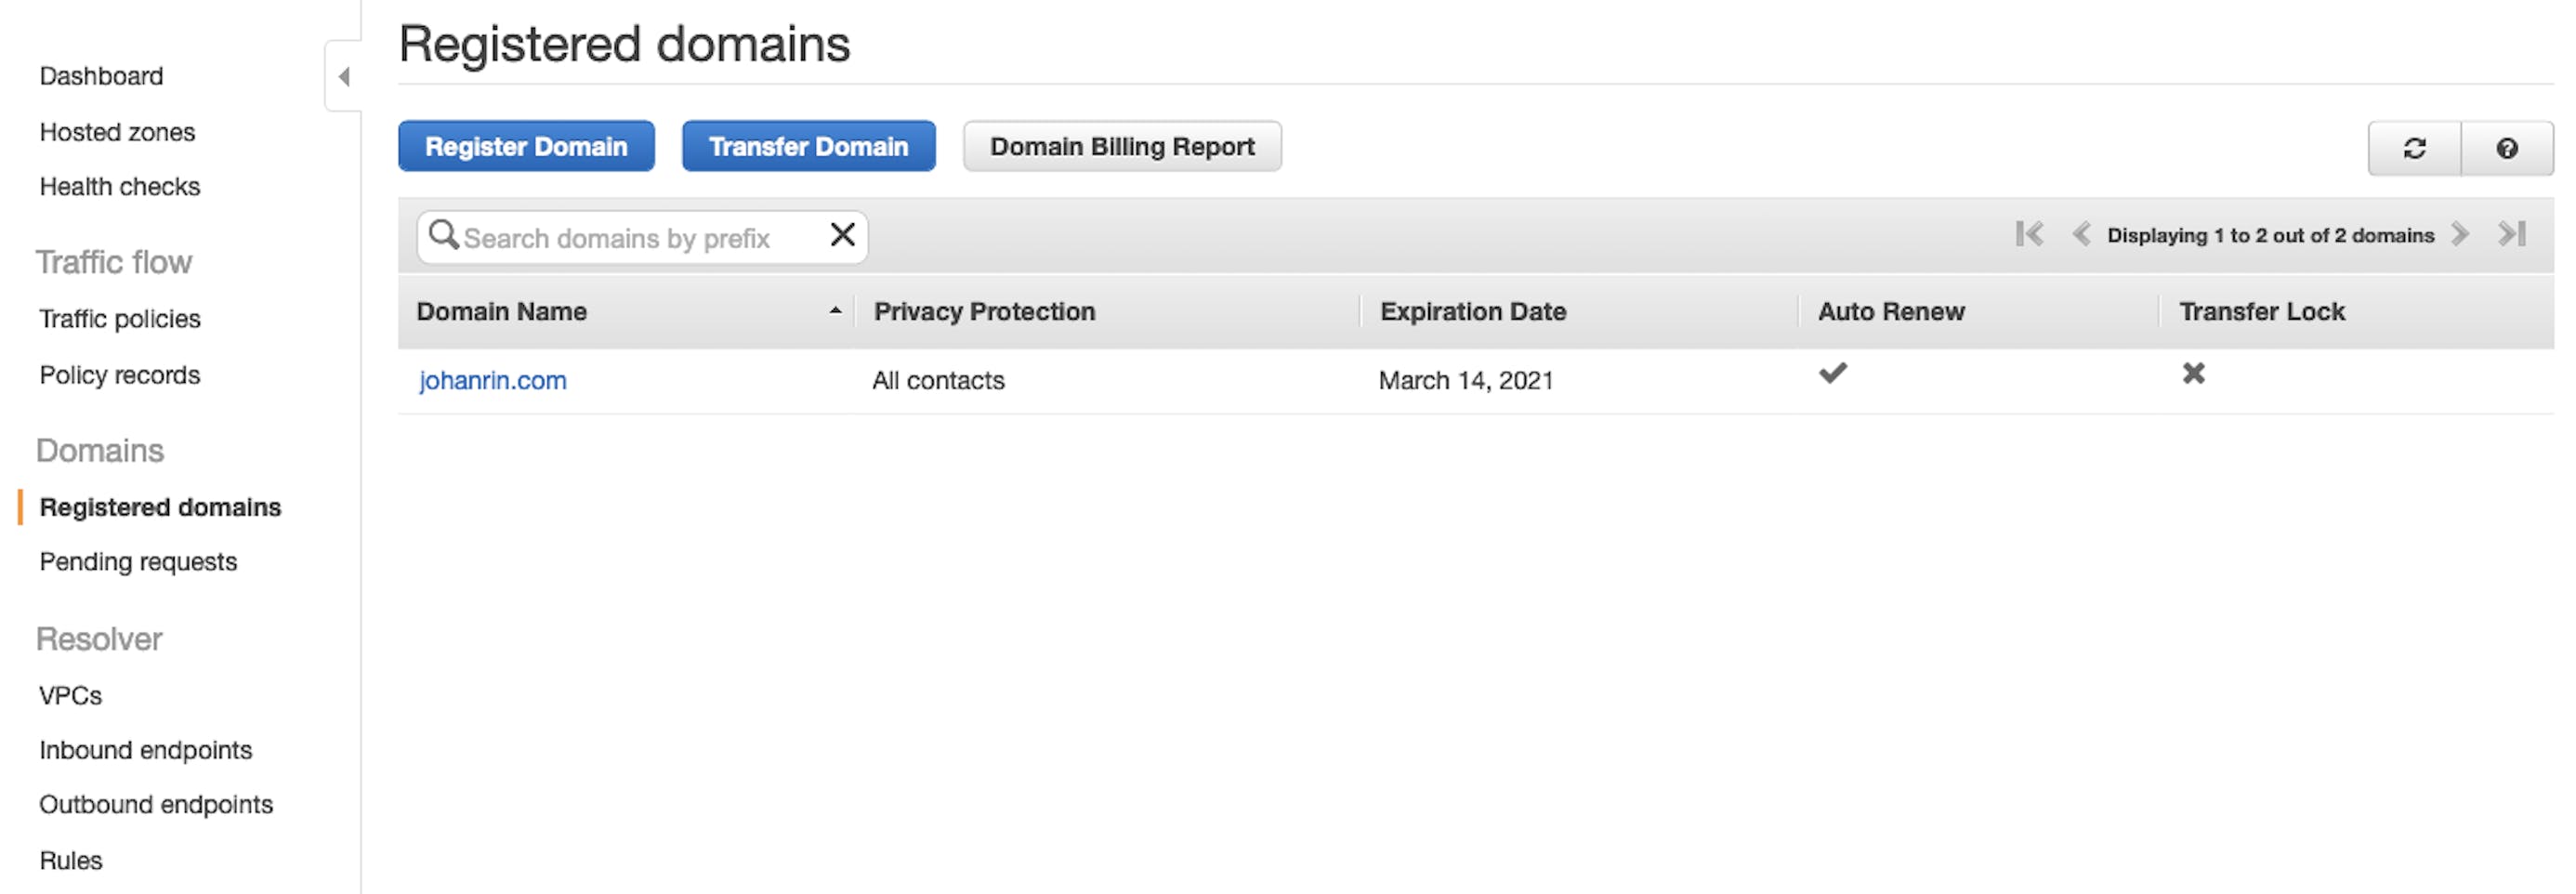
- Click Add or edit name servers, enter Cloudflare's nameservers, and click Update:

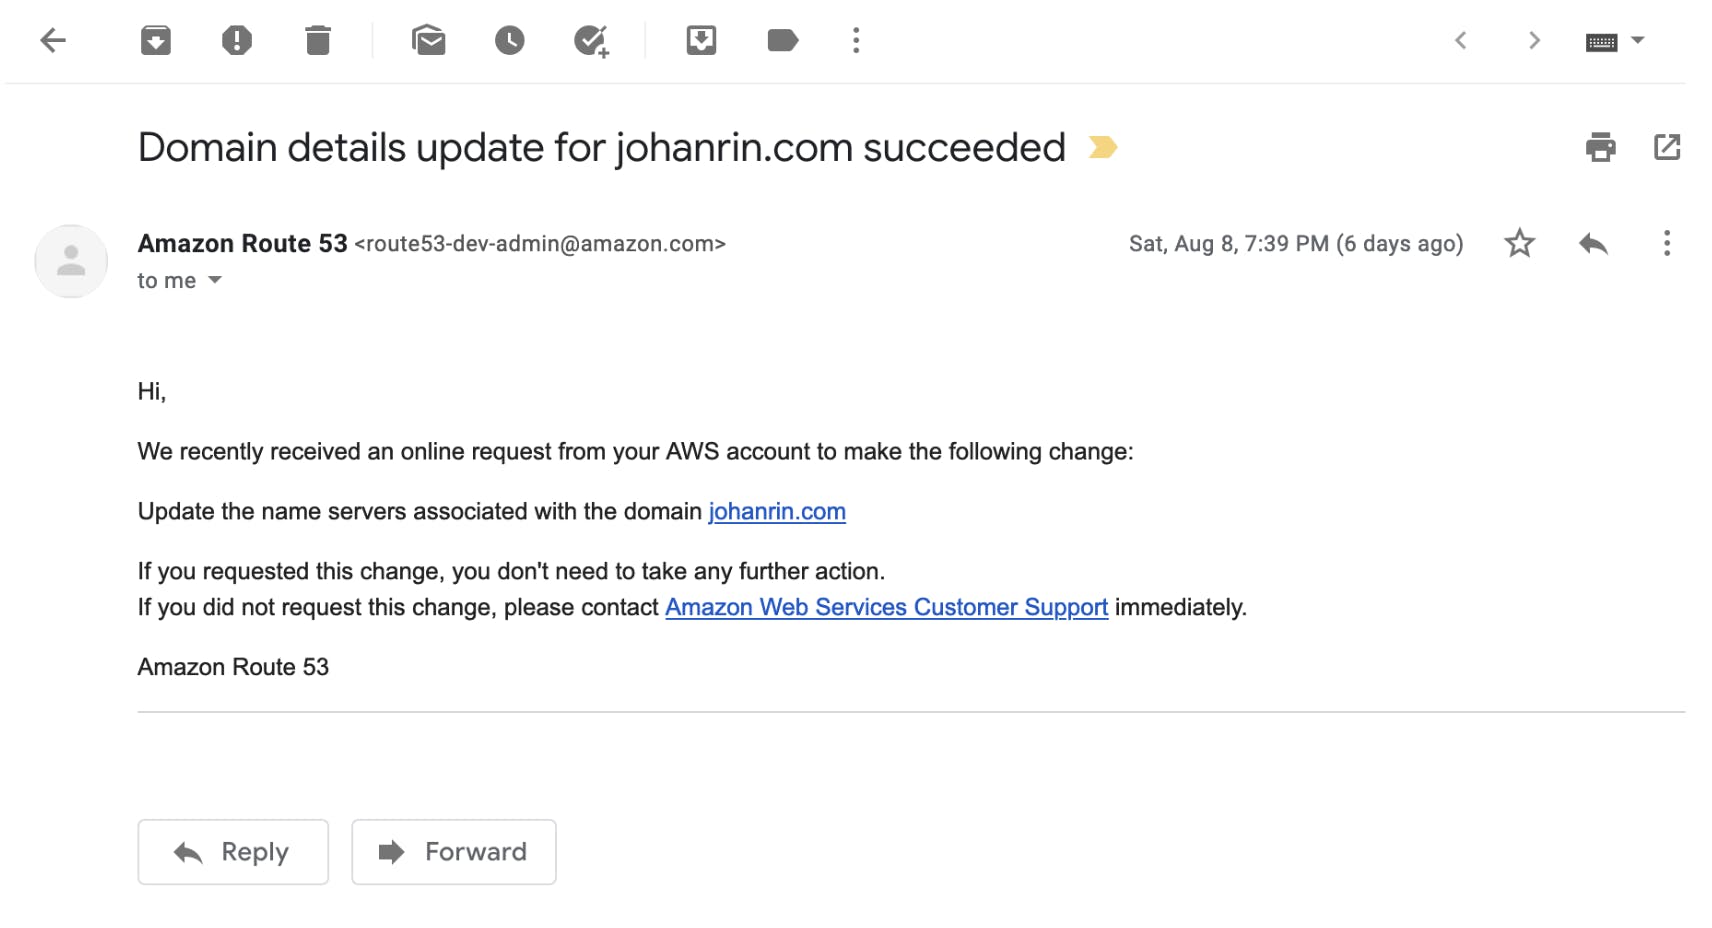
- You will receive an email when the name servers associated with your domain are updated:
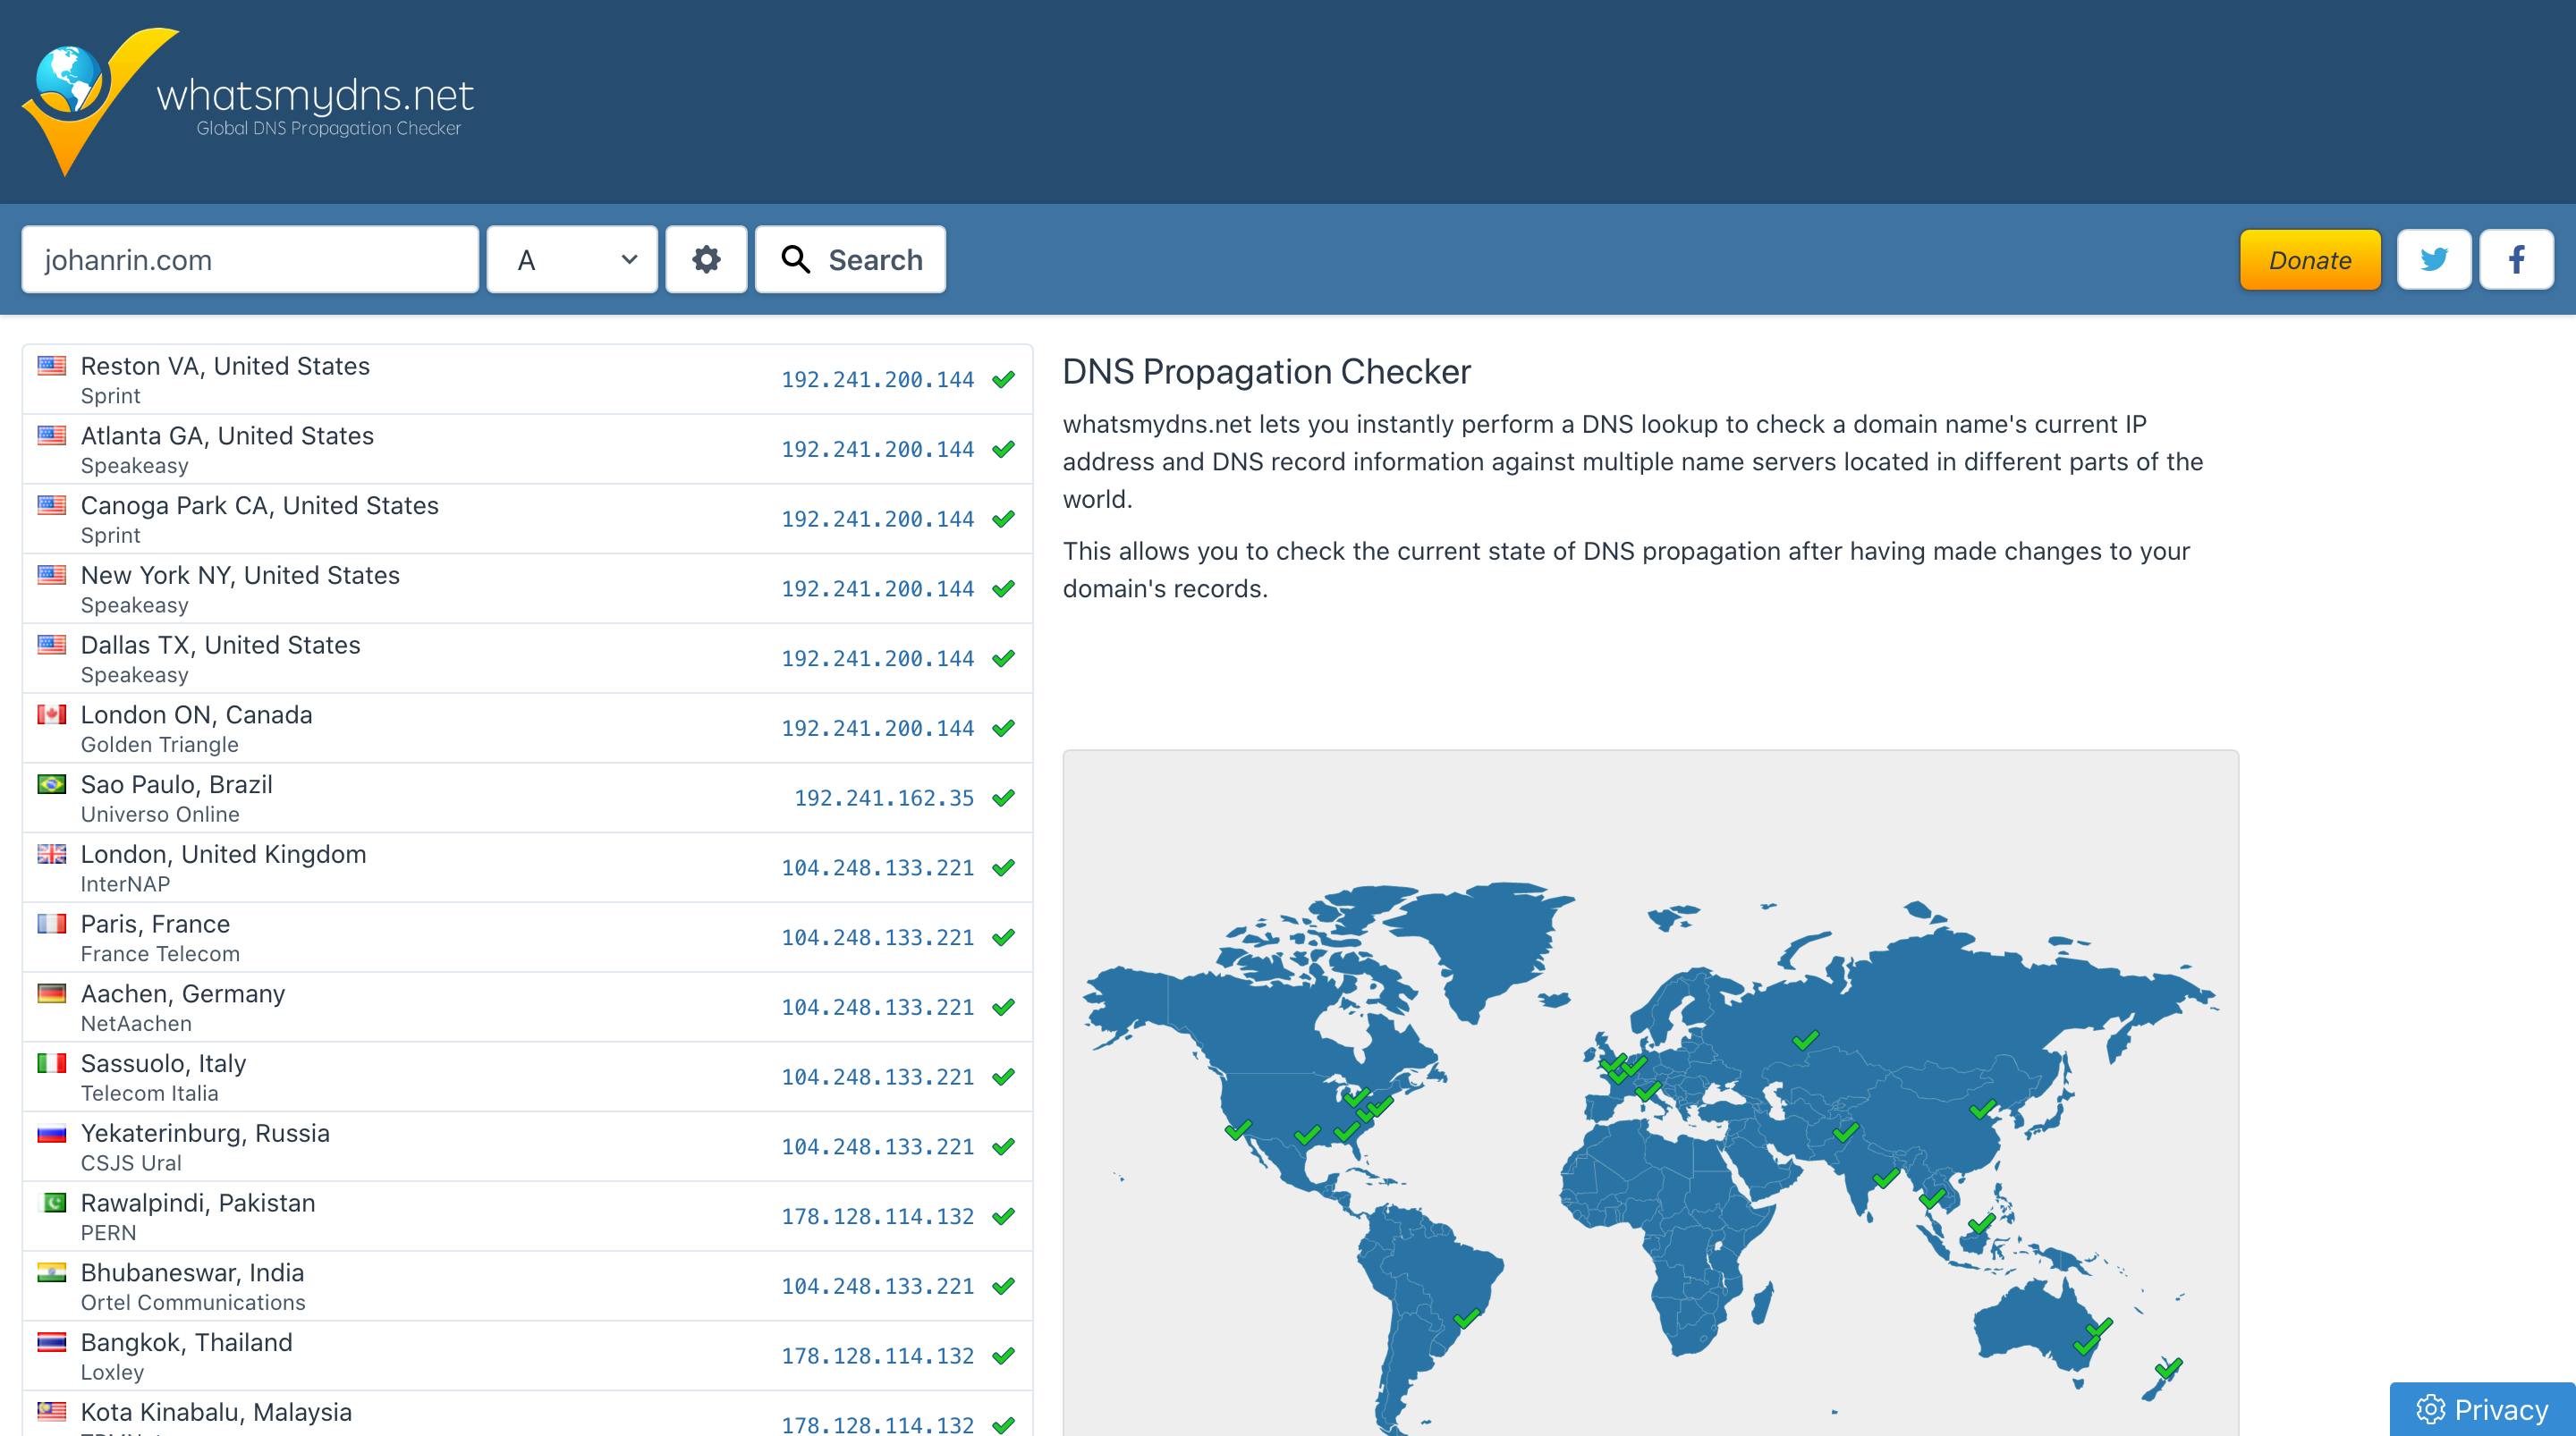
- After a few minutes, check your DNS propagation with whatsmydns.net
That's it! Your domain name is now part of Hashnode, and you can now migrate all your articles!
Conclusion
Congratulations, you migrated your blog to Hashnode with only two steps! 🎉🎉🎉
The process can be overwhelming at first, especially if you want to use your root domain as your blog URL. Hopefully, Cloudflare makes our migration easier because it supports CNAME Flattening, which allows you to create a CNAME record at the root domain with the value hashnode.network.
That's it for me, hope you learned something! If you have any questions, find me on Twitter and feel free to ask me anything 🙏